Create Skin
- AI-JEDI
Introduction
You can create your own skin graphic within the Studio Interface Kit. This feature offers design flexibility with the look and feel of the skin graphic you wish to display on Andromeda's HMI products. The following page provides instructions on how to get started.
Video Overview:
How To
- Select New→Skin from top menu

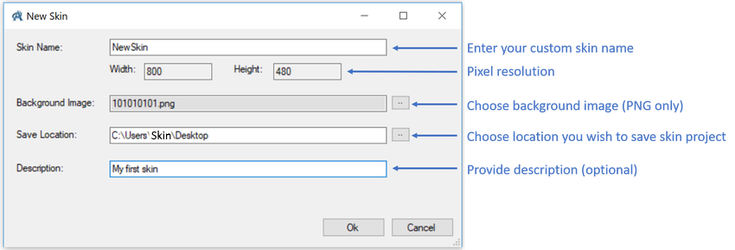
2. A new window will appear with a list of options to get started with your new skin graphic. See the screenshot below. You can download example background images at Skin Background Images.
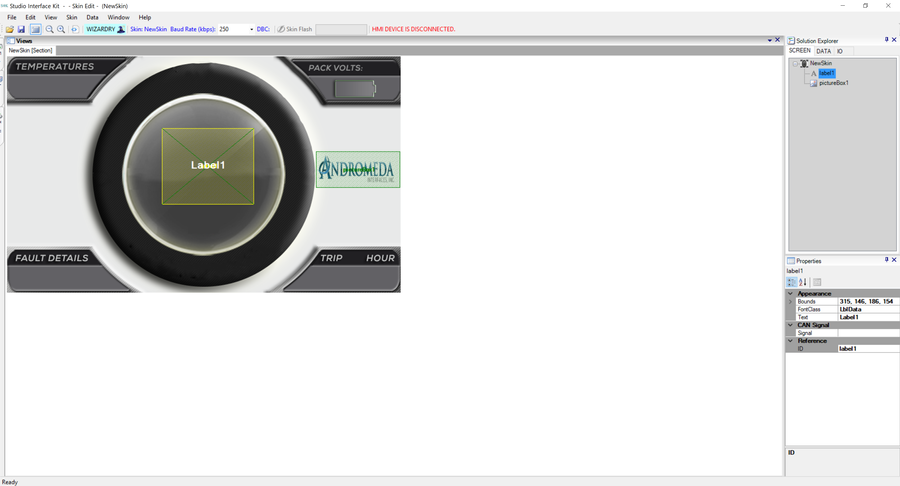
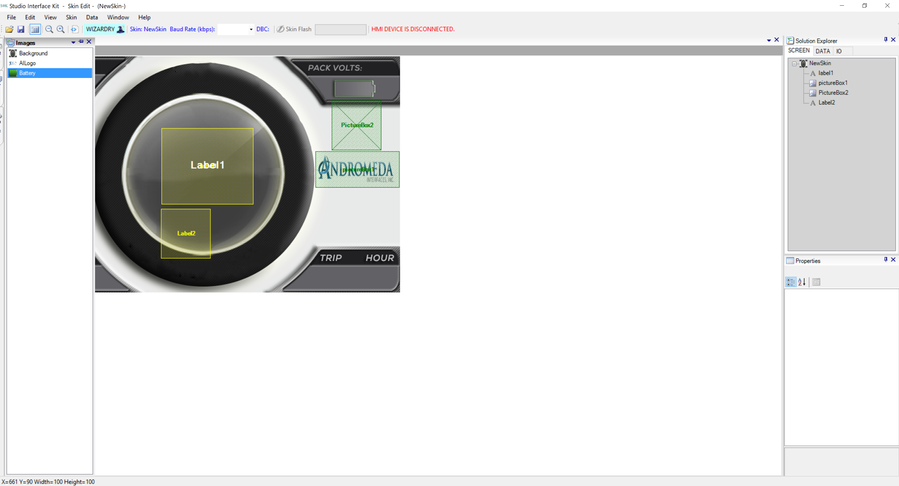
3. Your newly created skin graphic will appear on the canvas. The first default control Label will be present with a text readout of "Label1" and a control Picture Box with a default logo.
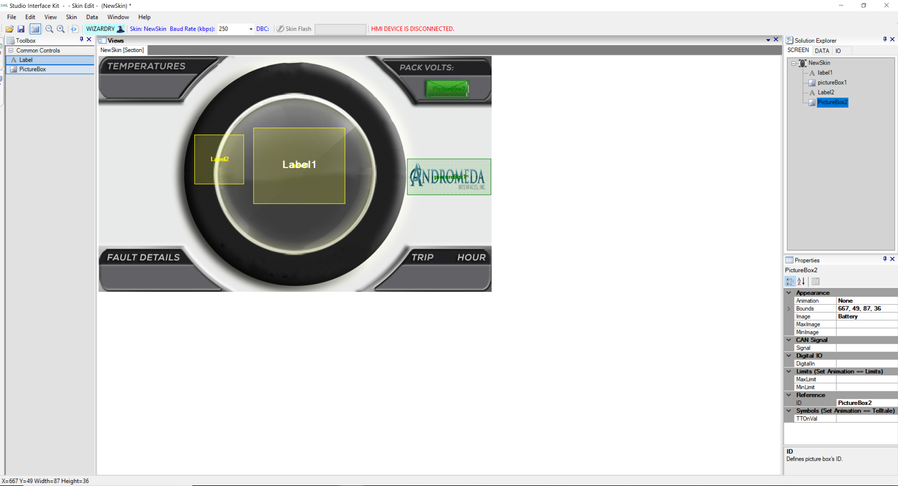
4. You can add new controls onto the skin graphic by selecting and dragging them onto the canvas from the Toolbox. The Toolbox is located on a tab on the left-hand side of SIK.
5. You can add new images or font styles from Skin→Add Image or Skin→Add Font.

6. Once you have imported your new image or font style, you can view them from the Image or Font tabs.
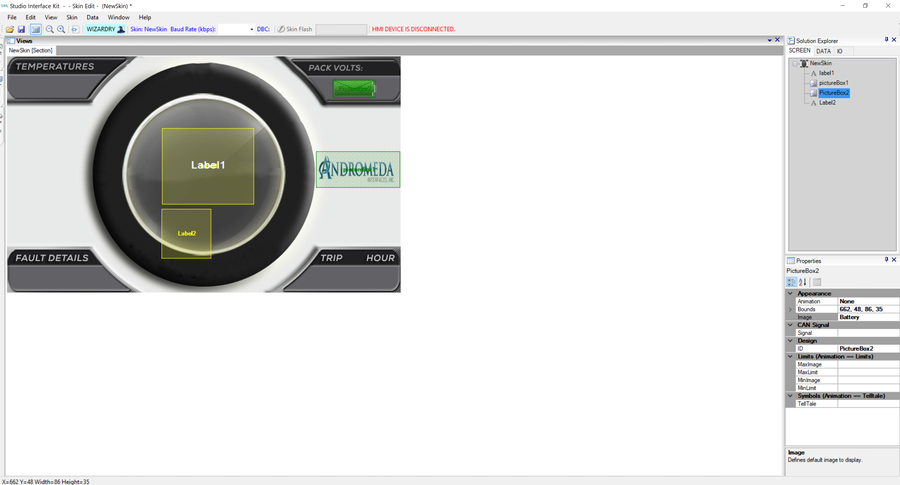
7. You can assign your new image to a picture box by selecting the picture box from Solution Explorer and in the Property section (directly below). From the Properties section, you can select images from the drop-down menu under "Image" to assign to the Picture Box.